Guide: Access the SlashID Console with SSO
To allow your team members to sign in to the SlashID Console using Single Sign-On (SSO), you must register credentials that identify and authenticate users via SAML or OIDC during login flows.
This guide walks you through the required configuration steps.
Before you begin
This feature is not enabled by default. Contact the SlashID team to enable it for your organization.
Registering credentials
Configuration is managed on the Console SSO page, where you can register either OIDC or SAML credentials.
OIDC credentials
Registering OIDC credentials for Console SSO follows the same process used for configuring applications with supported identity providers. For detailed steps, refer to the SSO setup guide.
SAML credentials
To configure SAML credentials, you’ll need:
- the metadata URL for your SAML Identity Provider (IdP)
- the name of the claim in the SAML response that contains the user’s email address (the first match will be used)
Configuration steps may vary depending on your IdP. Below is an example using OneLogin.
Example: OneLogin SAML Integration
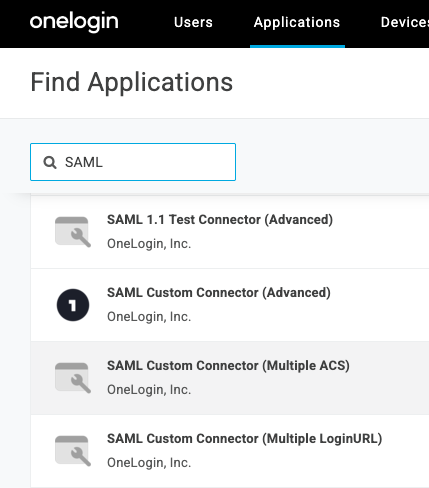
- From the OneLogin dashboard, create a new SAML Custom Connector (Advanced) application.
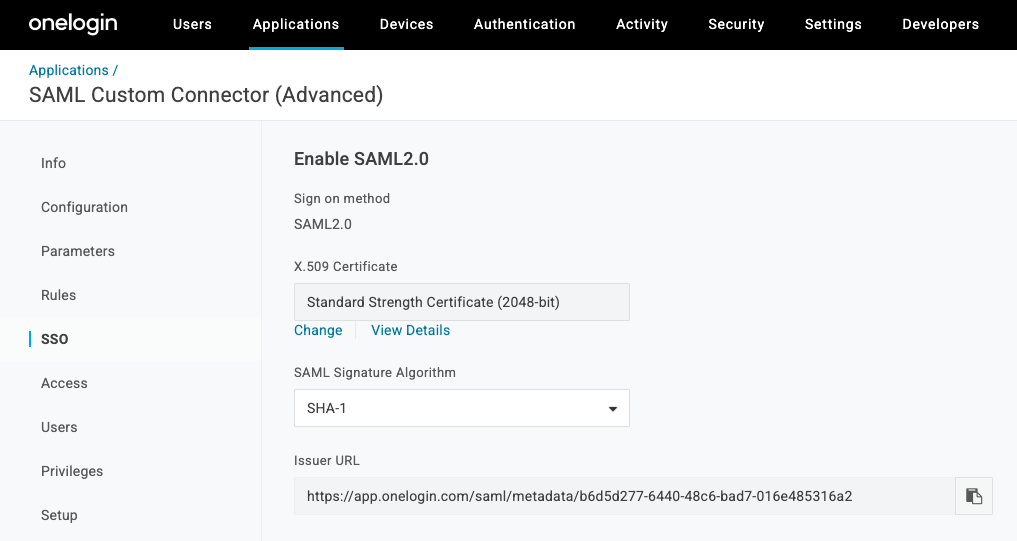
- Navigate to the SSO tab of the newly created application and copy the Issuer URL (IdP metadata URL).
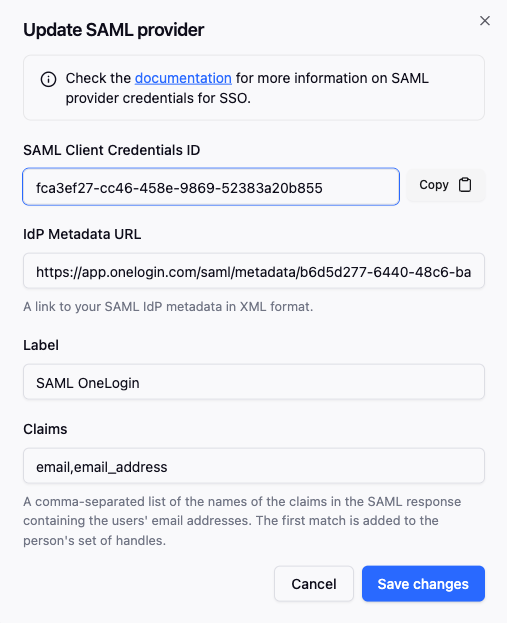
- In SlashID Console > Settings > Console SSO, create a new SAML credential pasting the copied Issuer URL in the IdP metadata URL field.
After the new SAML credential is created, copy and store the SAML Client Credentials ID. This will be used to configure the SAML application in OneLogin in the following steps.
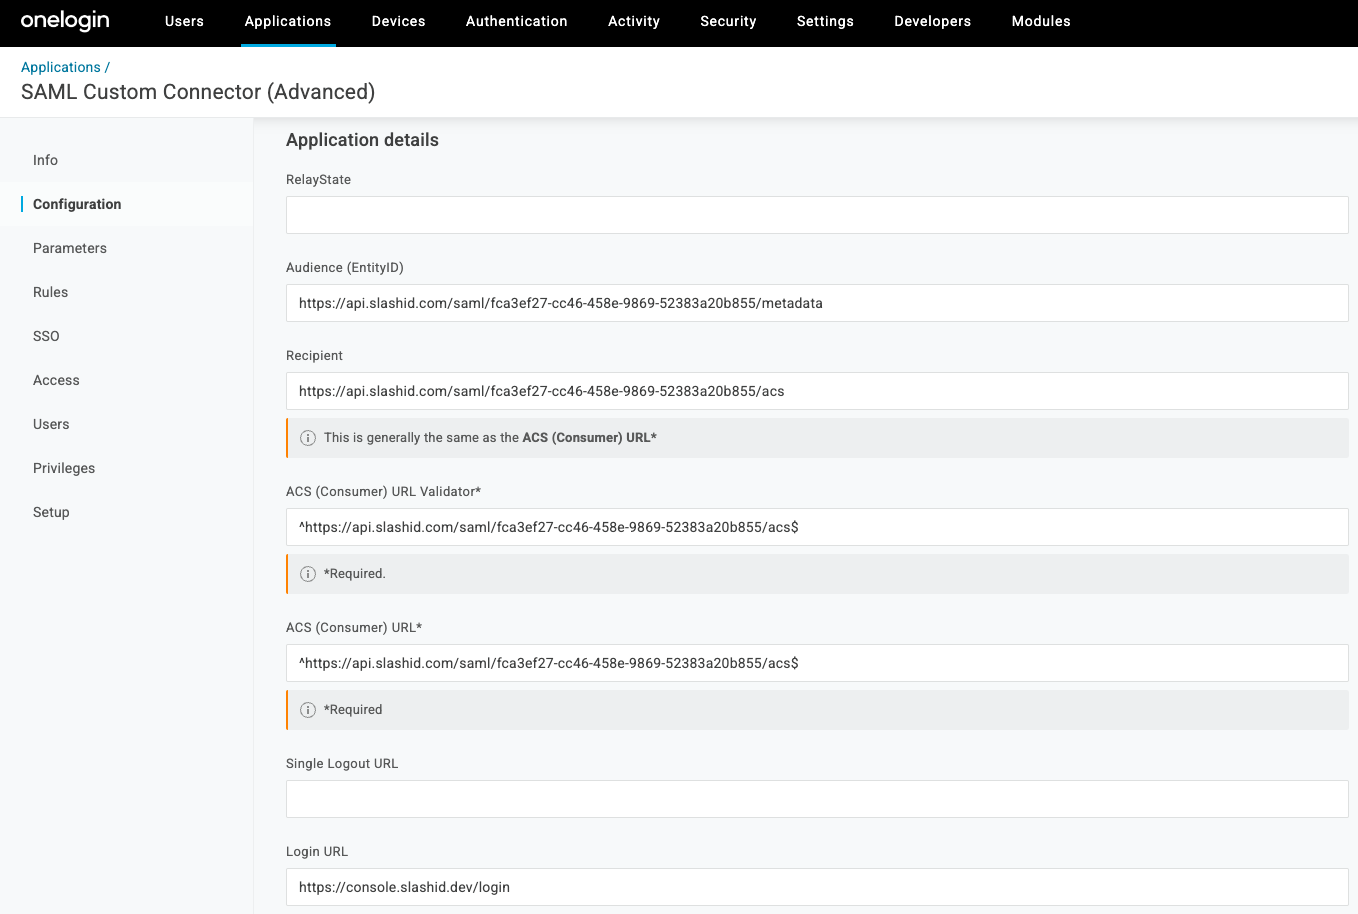
In the OneLogin dashboard, return to the SAML connector application you created in step 1. Go to the Configuration tab of the app and fill in the following fields replacing
{CREDENTIALS_ID}with the SAML Client Credentials ID value you copied in step 3:- Audience (EntityID):
https://api.slashid.com/saml/{CREDENTIALS_ID}/metadata - Recipient:
https://api.slashid.com/saml/{CREDENTIALS_ID}/acs - ACS (Consumer) URL Validator:
^https://api.slashid.com/saml/{CREDENTIALS_ID}/acs$ - ACS (Consumer) URL:
^https://api.slashid.com/saml/{CREDENTIALS_ID}/acs$ - Login URL:
https://console.slashid.dev/login
- Audience (EntityID):
Once you save the changes, your team members will be able to access the SlashID Console using SSO via OneLogin. If you encounter any issues during setup, contact the SlashID support team.
Example: Okta SAML Integration
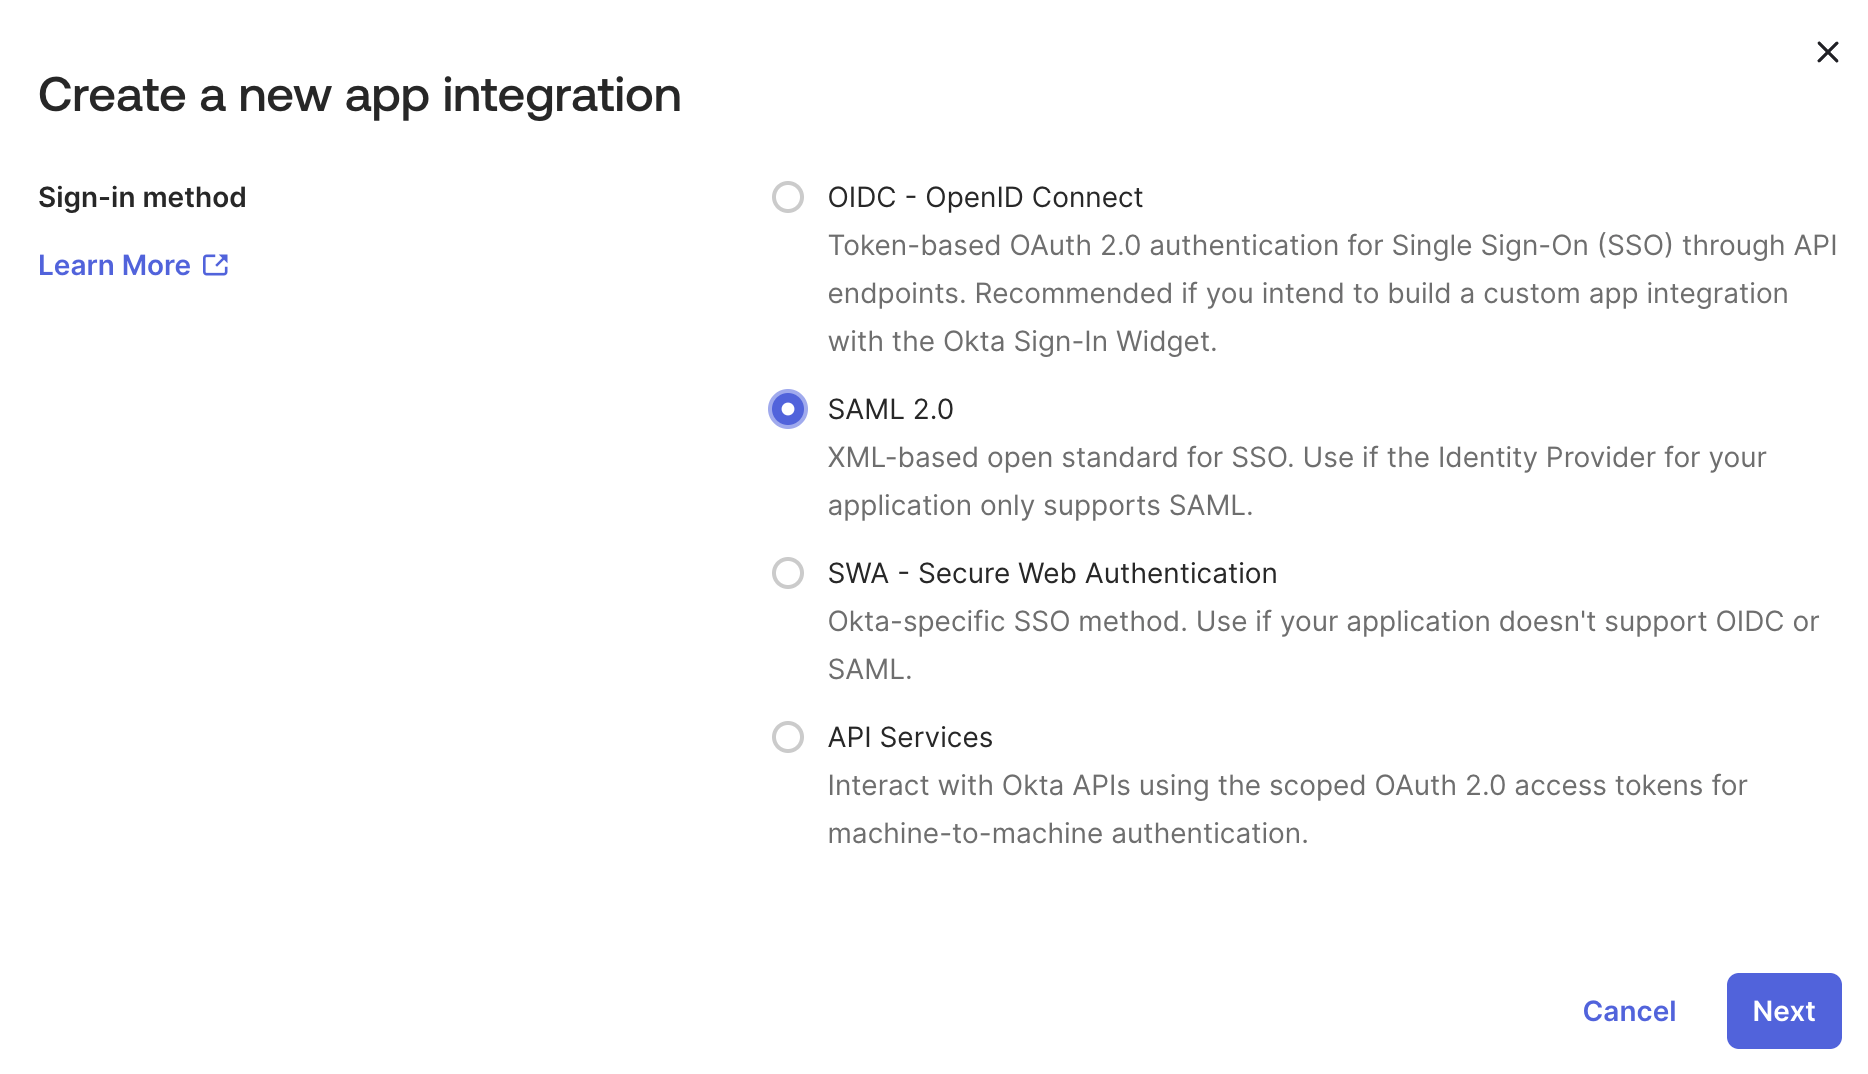
- In the Okta Admin dashboard go to Applications > Applications. Click Create App Integration button and pick SAML 2.0.
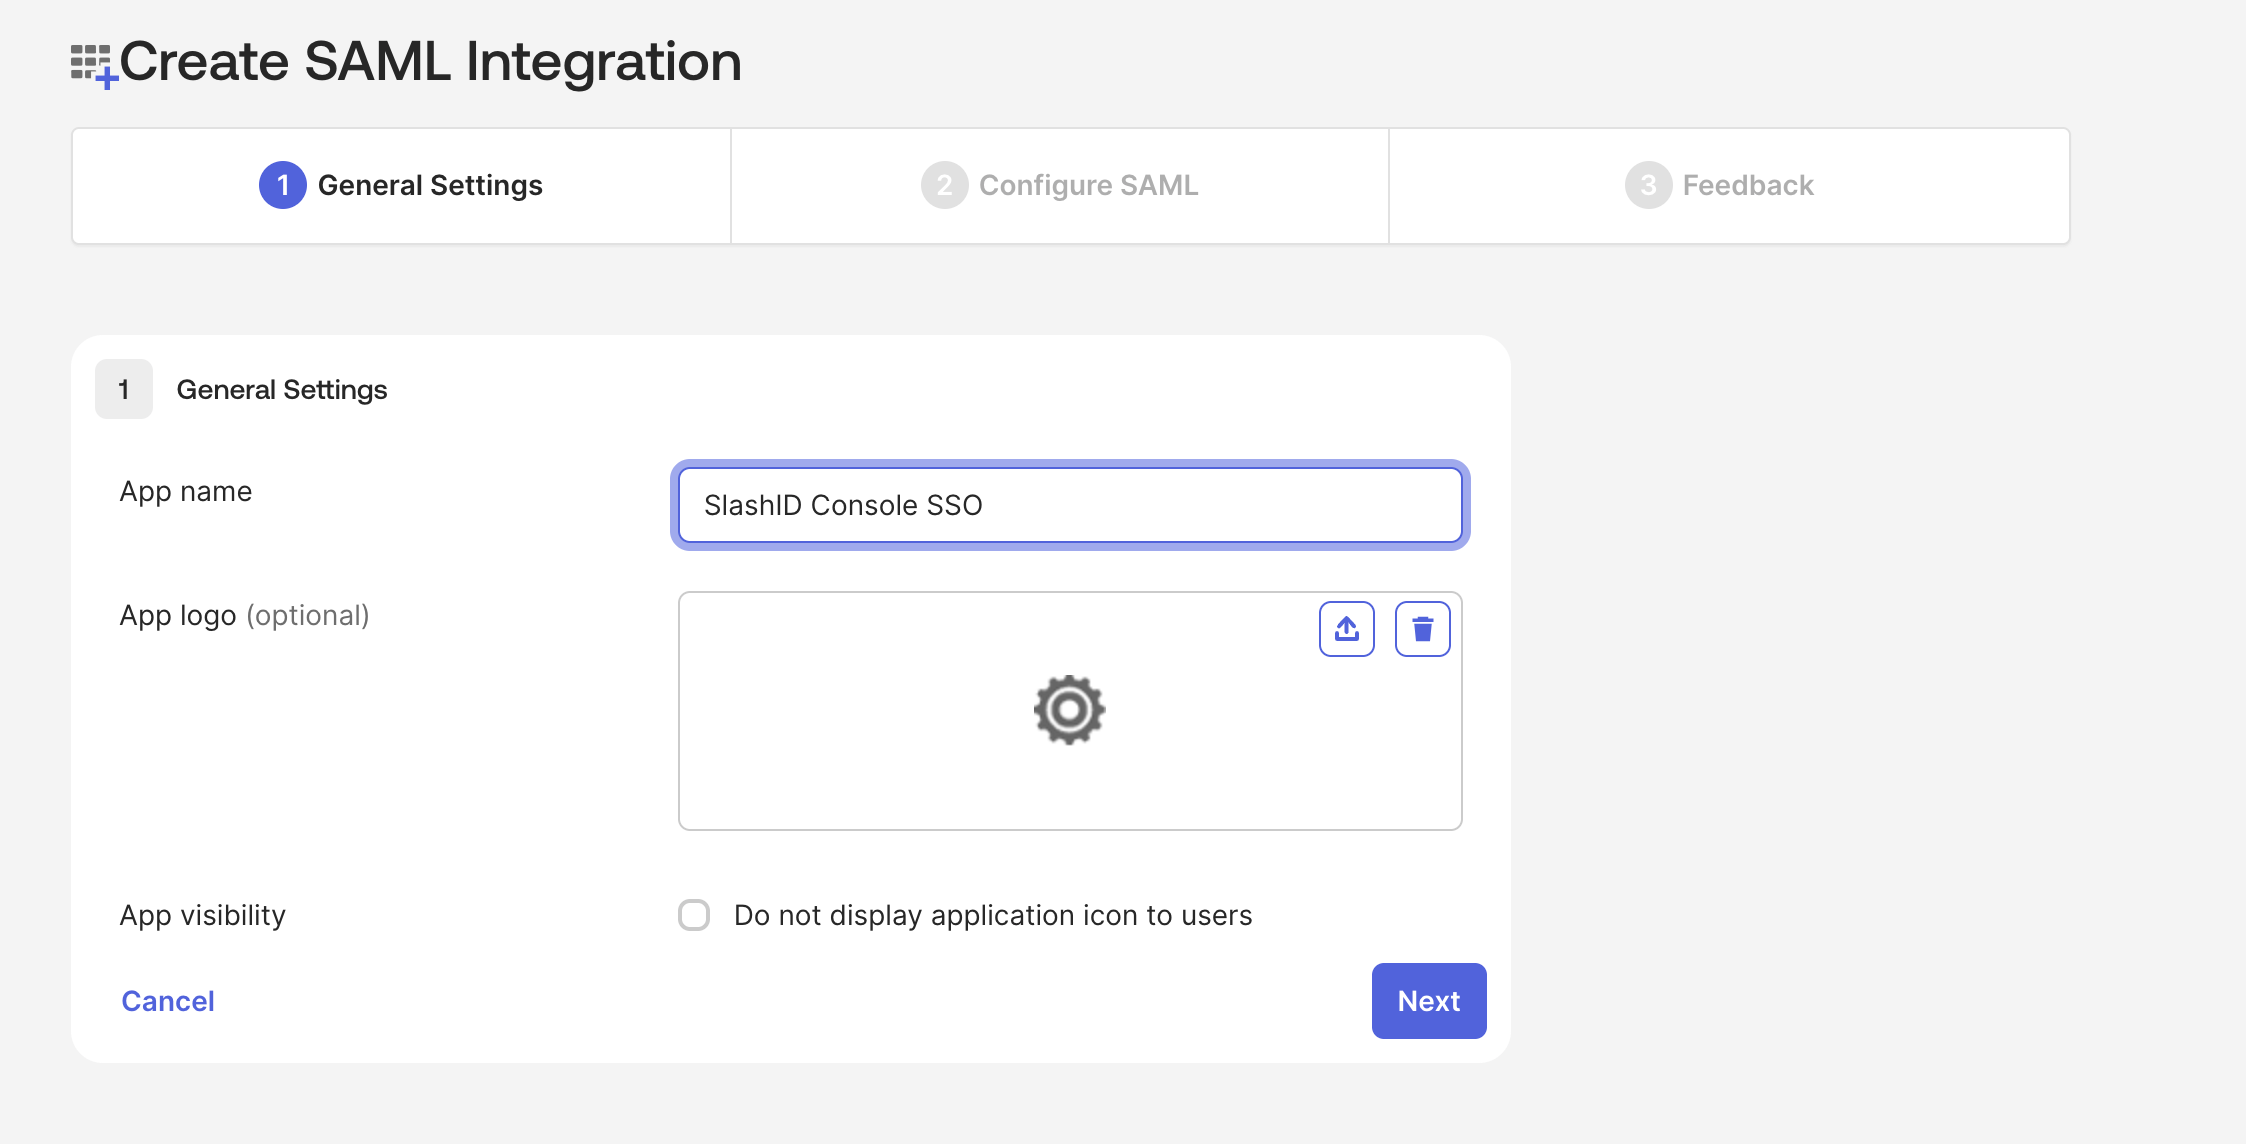
- Choose a name and optionally a logo for your SAML application.
- Go to the next page, fill in the General settings:
- Single sign-on URL:
https://api.slashid.com/saml/CREDENTIALS_ID/acs- Mark the Use this for Recipient URL and Destination URL checkbox
- Audience URI (SP Entity ID):
https://api.slashid.com/saml/CREDENTIALS_ID/metadata
We don't have CREDENTIALS_ID yet, so leave it as a placeholder for now. We first need to create a SAML application to obtain the IdP Metadata URL.

- Finish the application setup.
- Open the newly created application's details. Go to Sign On tab and copy the Metadata URL.
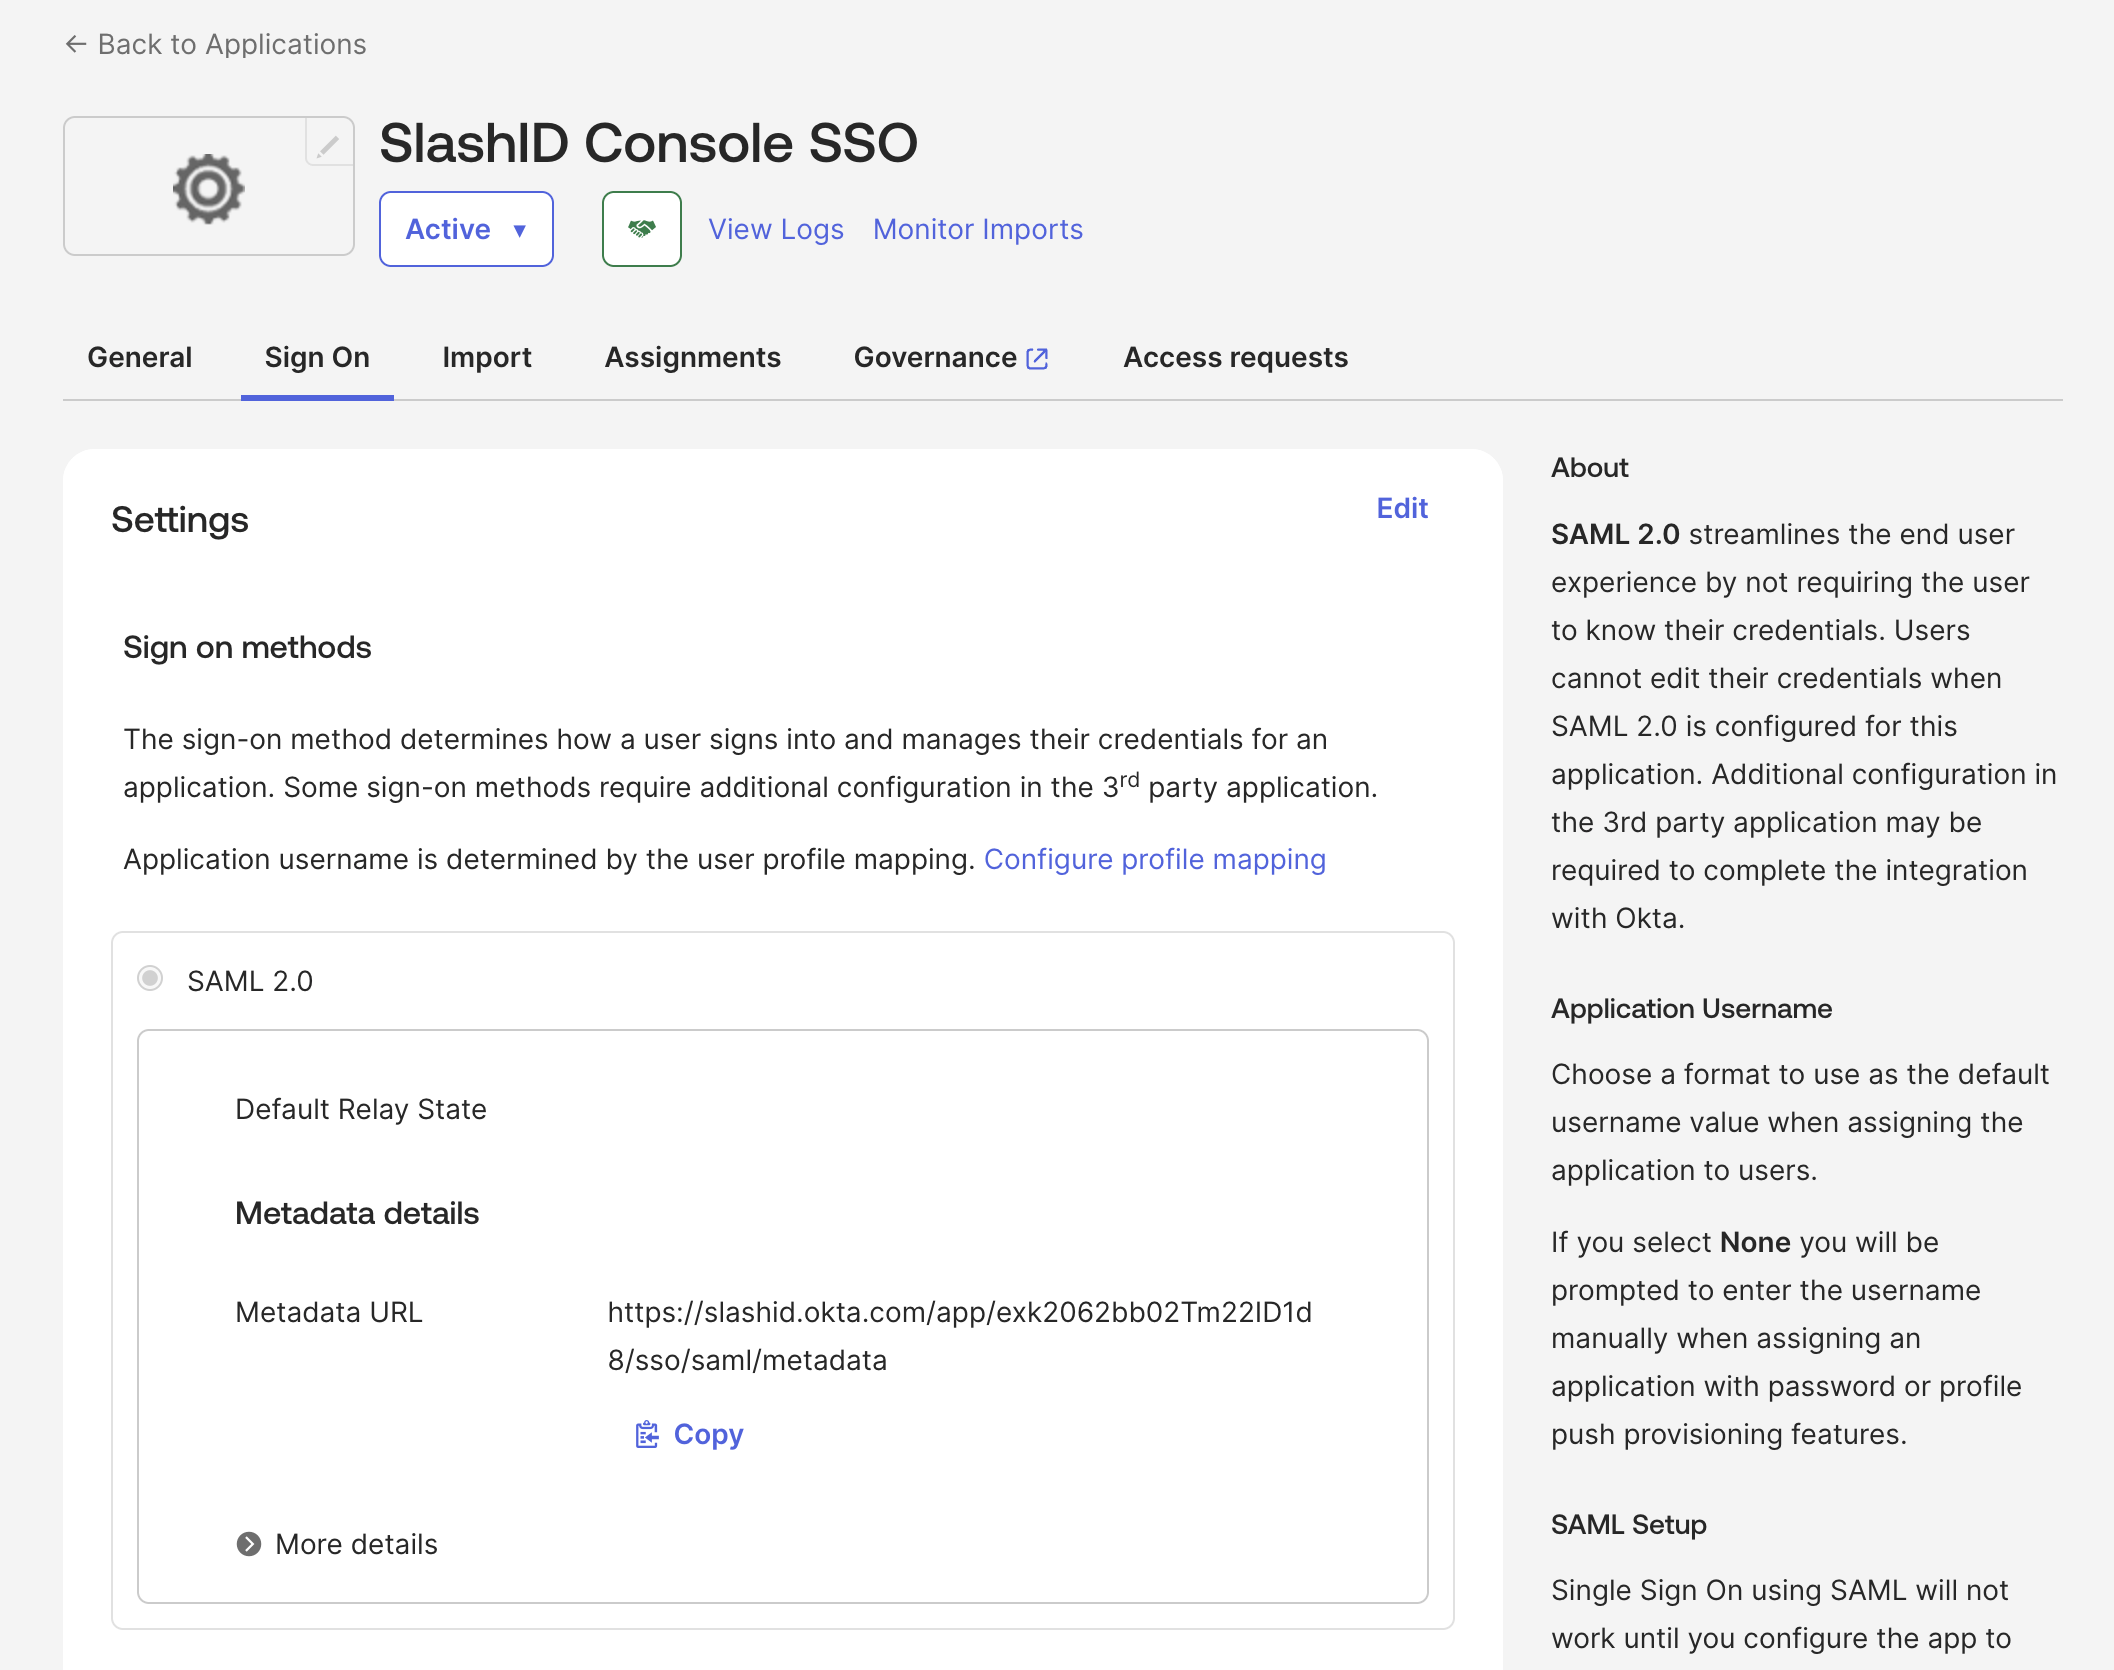
- In SlashID Console > Settings > Console SSO, create a new SAML credential pasting the copied Metadata URL in the IdP metadata URL field.
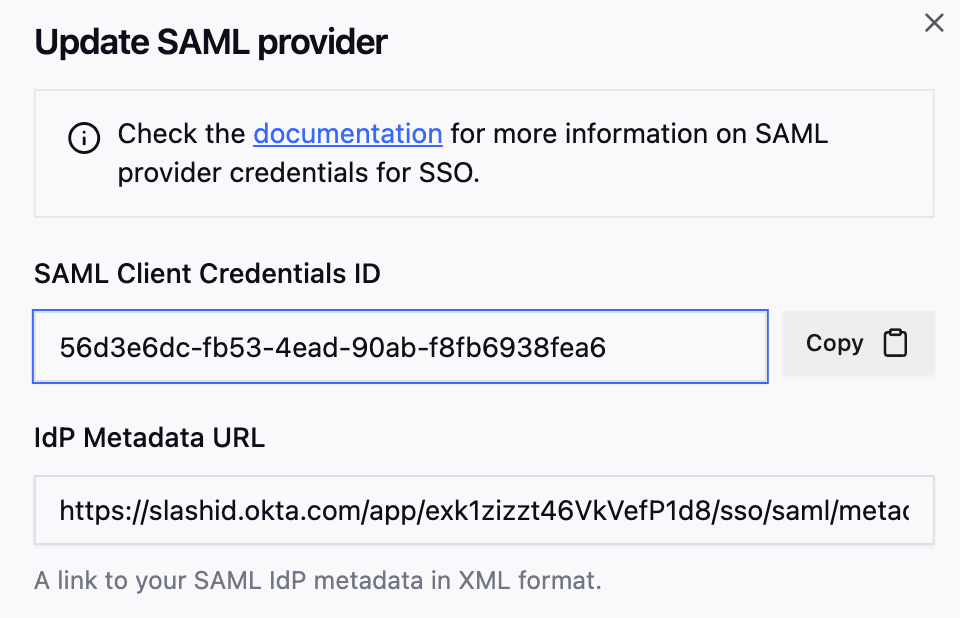
After the new SAML credential is created, copy and store the SAML Client Credentials ID. This will be used to configure the SAML application in Okta in the following steps.
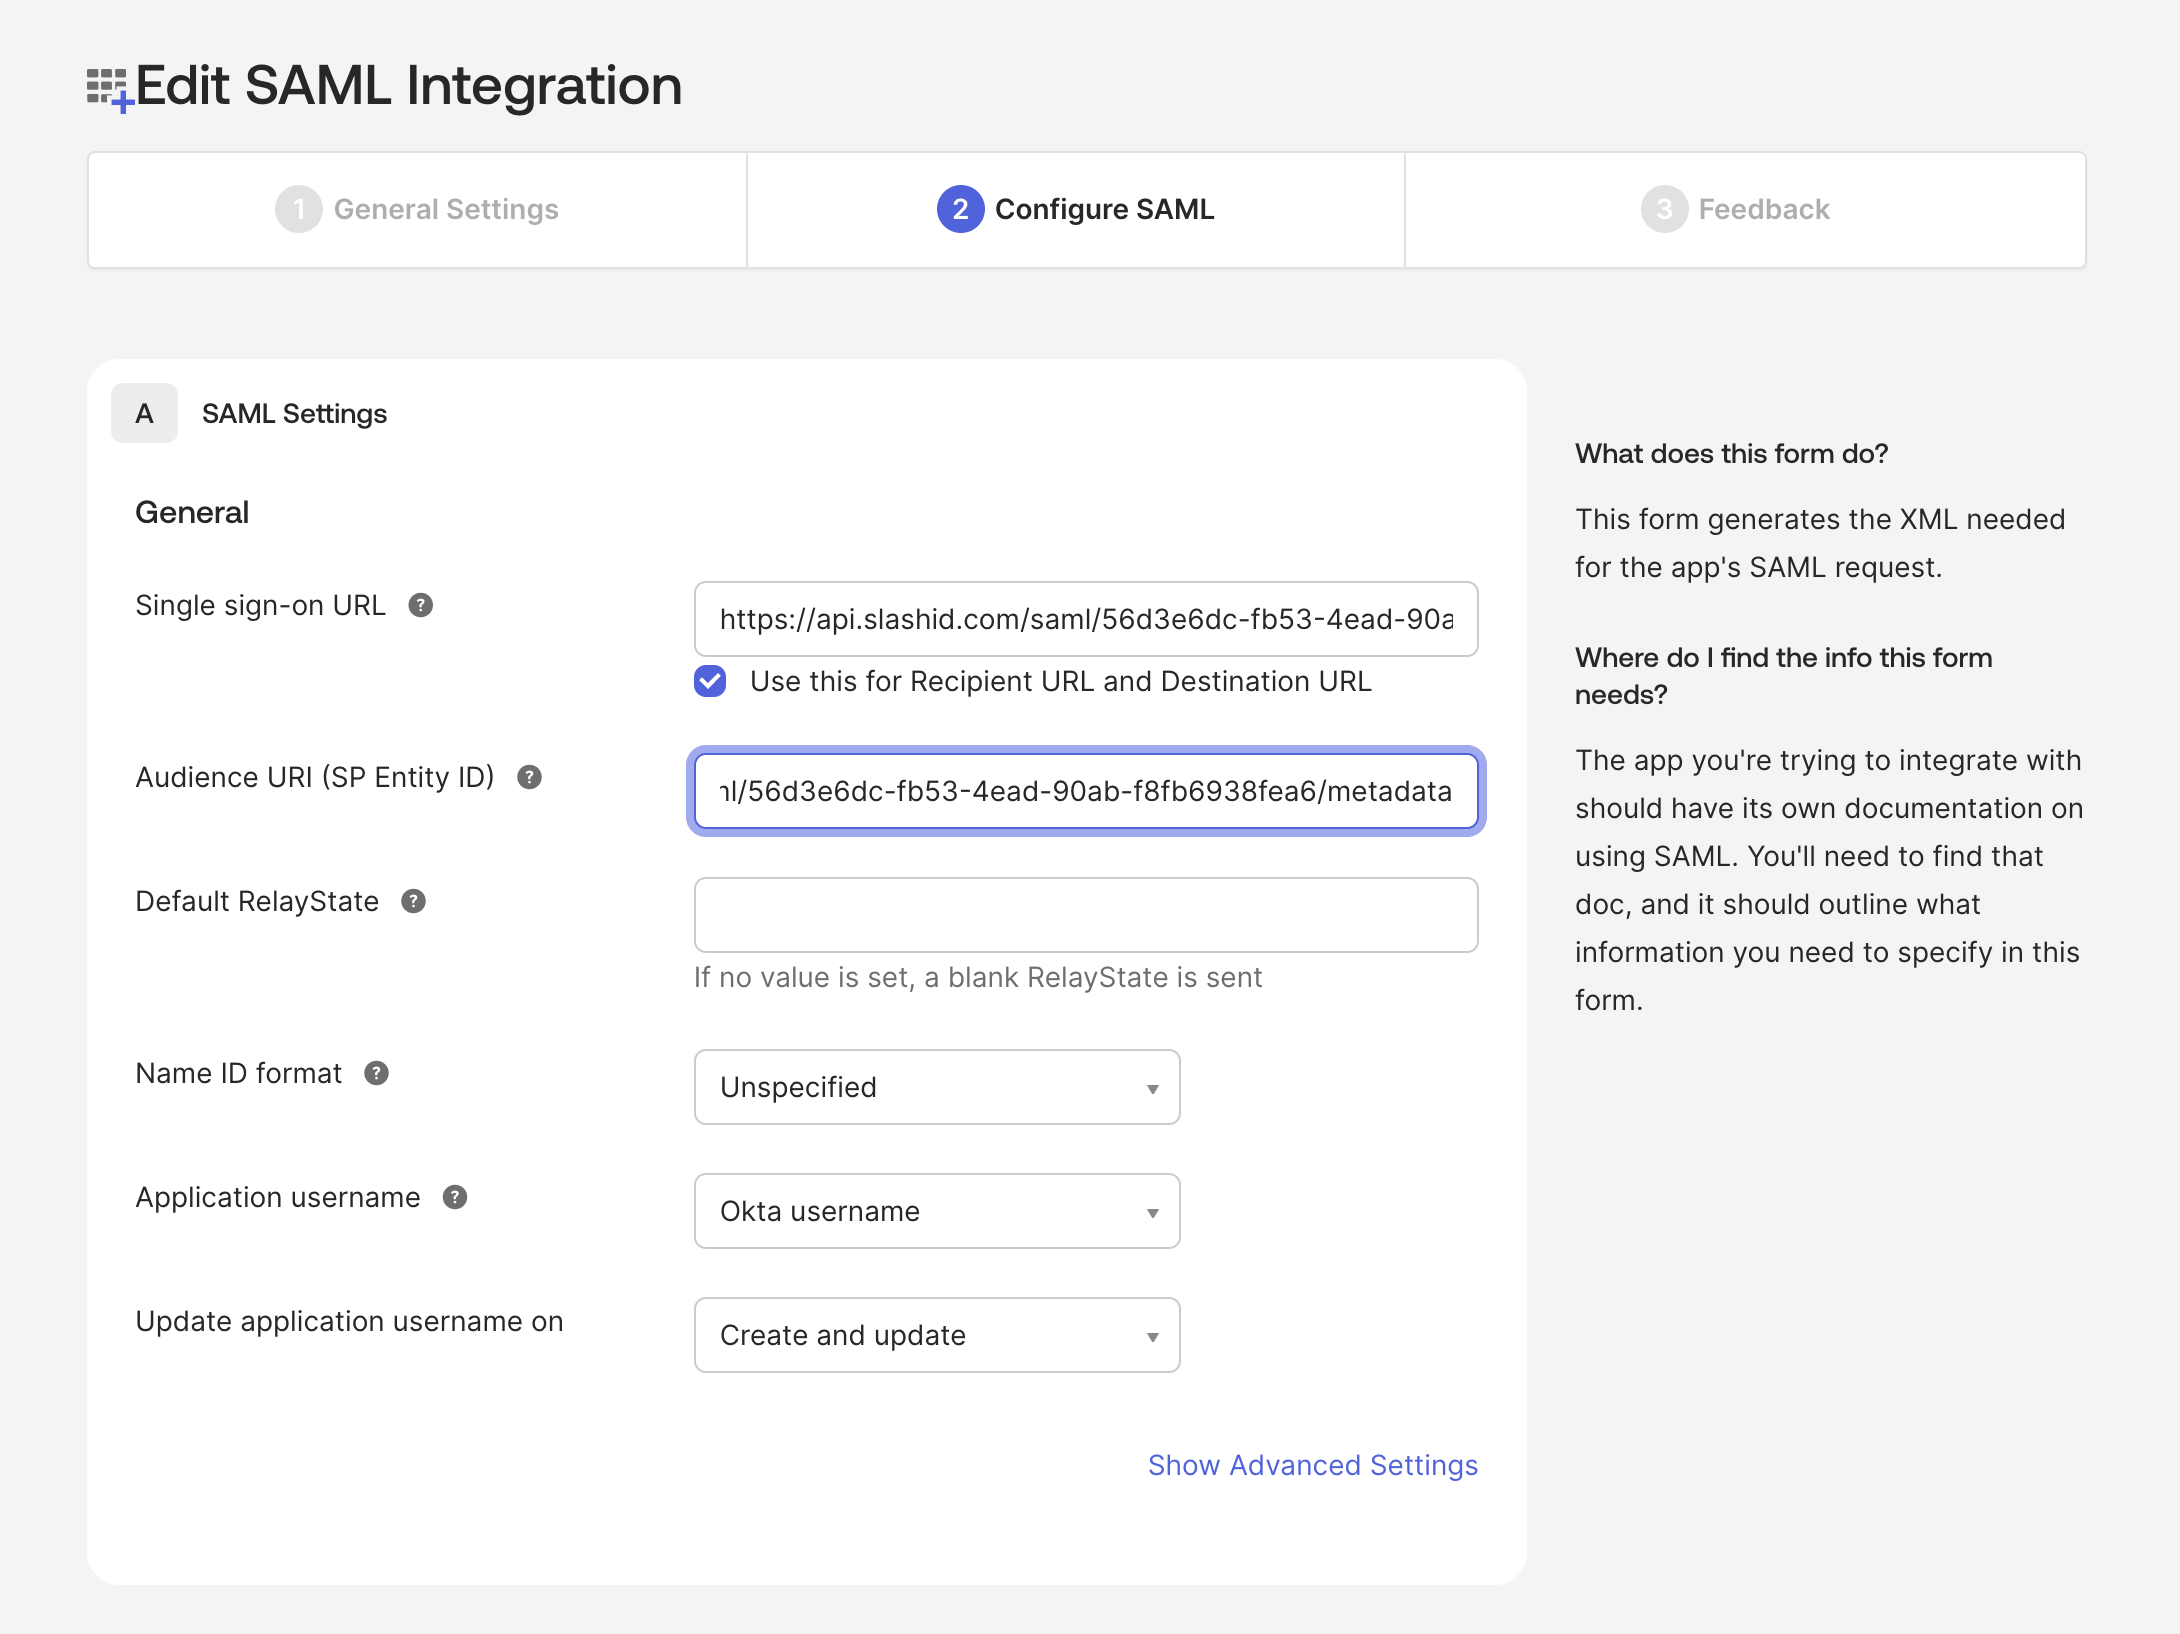
- Return to the application in Okta Admin. Go to General tab, scroll down to SAML Settings block and click Edit. Go to the second Configure SAML step and replace
CREDENTIALS_IDwith the SAML Client Credentials ID you copied in the previous step. Save your changes.
Once you save the changes, your team members will be able to access the SlashID Console using SSO via Okta SAML integration. Make sure to assign users to the application in Okta.
If you encounter any issues during setup, contact the SlashID support team.
Example: Entra SAML Integration
- In Microsoft Entra admin center, go to Enterprise apps > All applications and click + New application button.
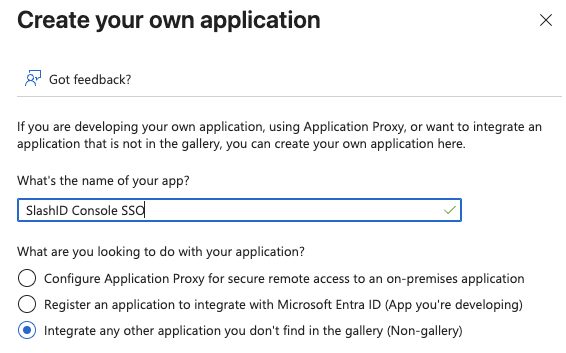
- Select + Create your own application, give your app a name and make sure that Integrate any other application you don't find in the gallery (Non-gallery) option is selected.
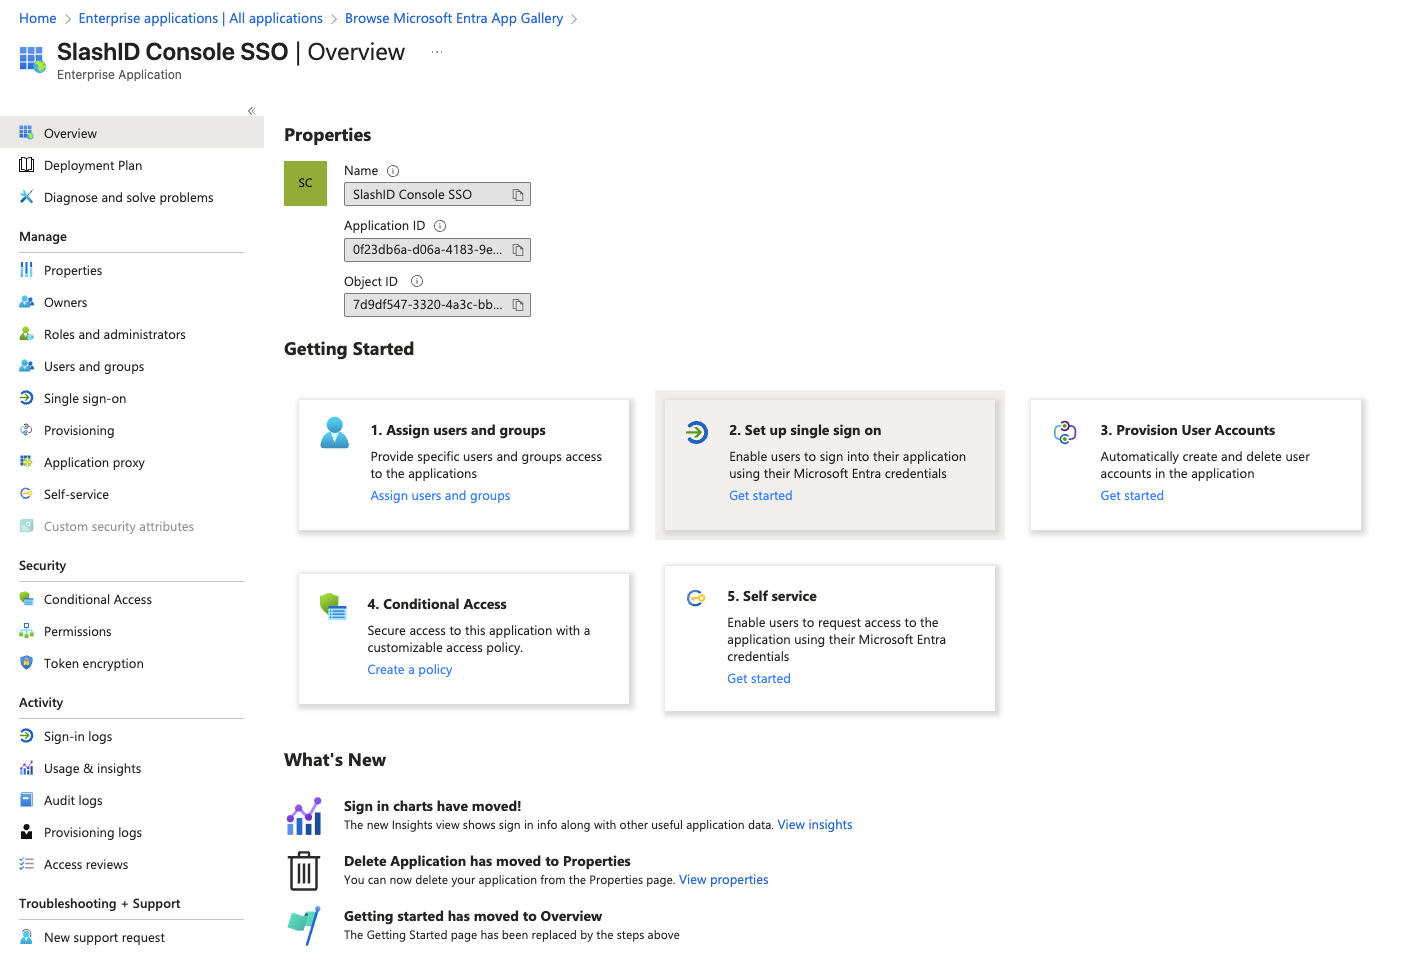
- You should now see your new application details. Go to Getting started section and select 2. Set up single sign on > Get started
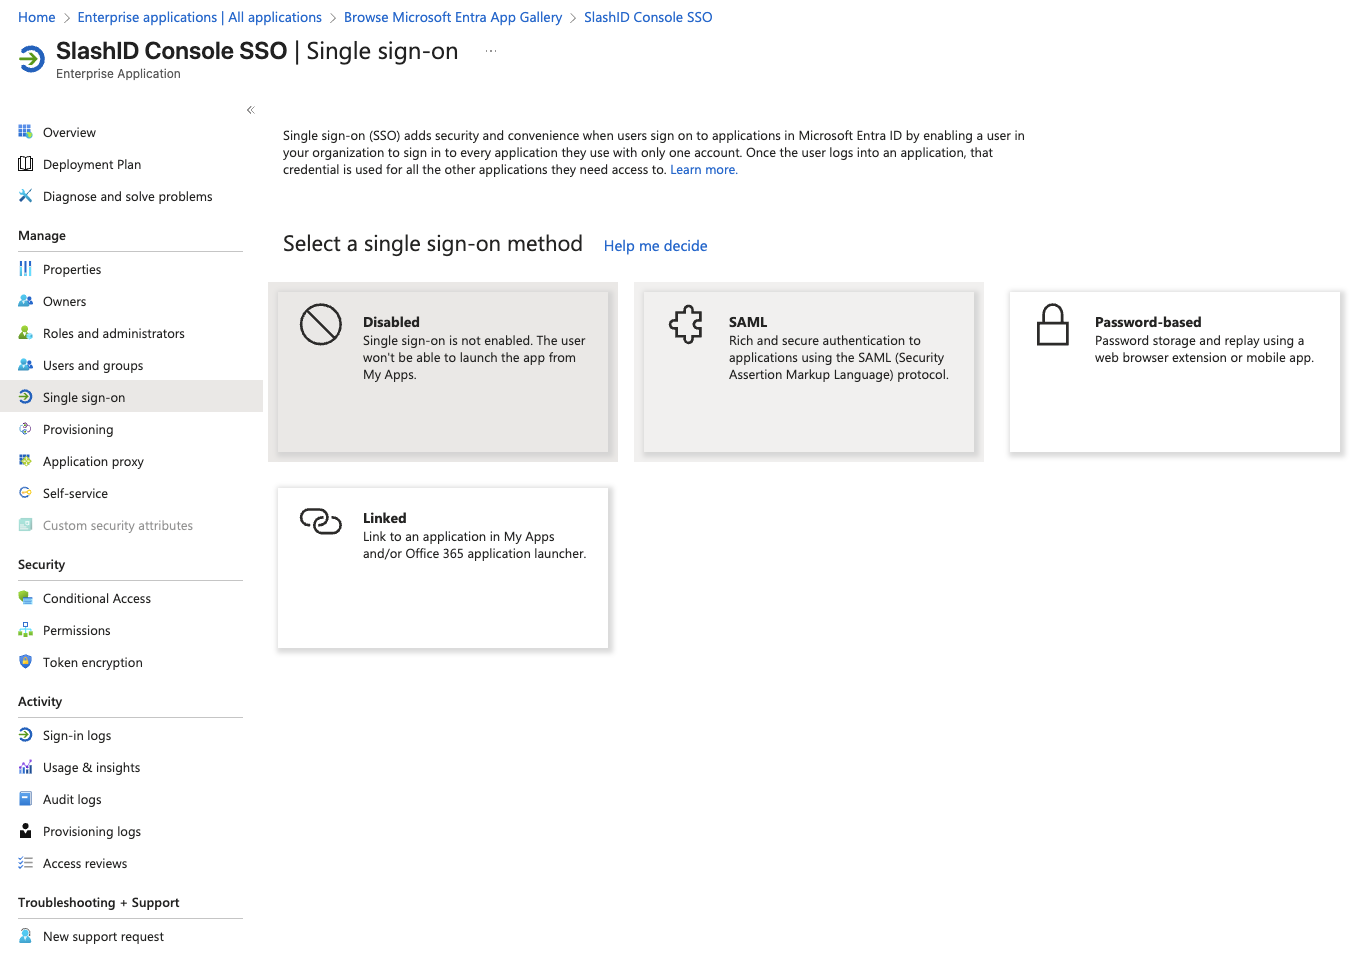
- Select SAML SSO method.
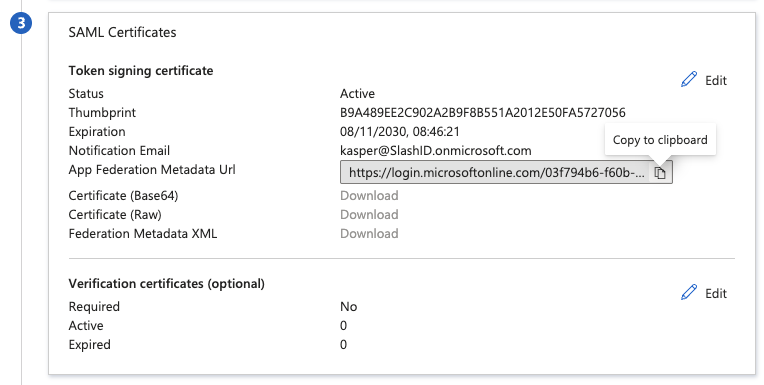
- Scroll down to SAML Certificates card and copy the App Federation Metadata Url.
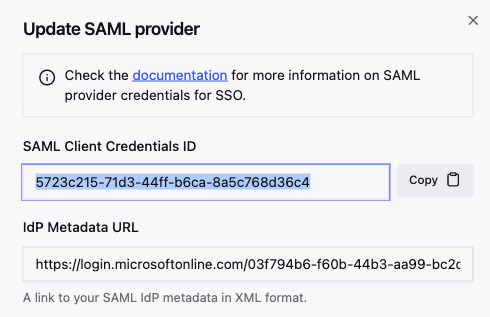
- In SlashID Console > Settings > Console SSO, create a new SAML credential pasting the copied Metadata URL in the IdP metadata URL field.
After the new SAML credential is created, copy and store the SAML Client Credentials ID. This will be used to configure the SAML application in Entra in the following steps.
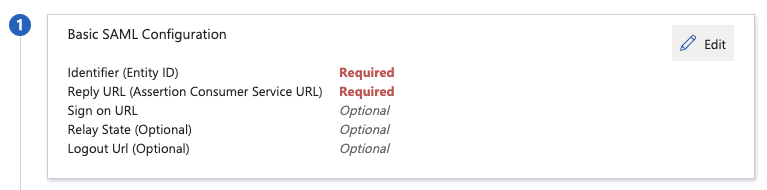
- Return to Entra application SSO setup and edit the Basic SAML Configuration.
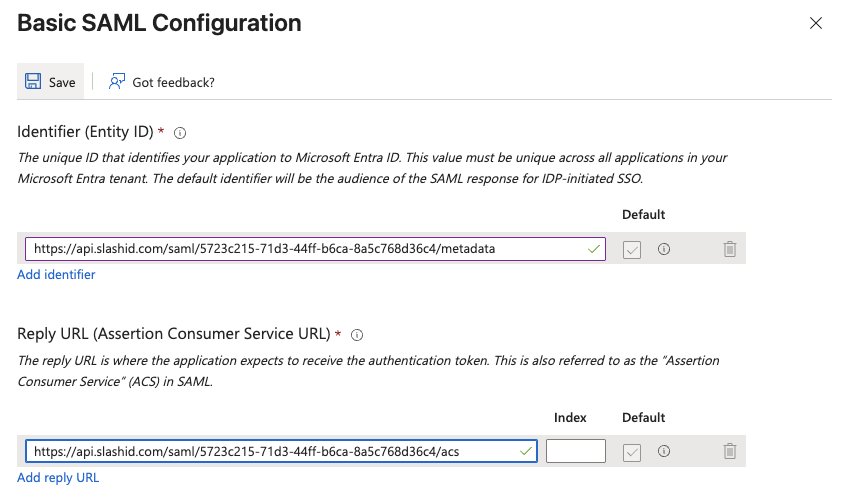
- Fill in the following fields replacing
{CREDENTIALS_ID}with the SAML Client Credentials ID value you copied in step 6:
- Identifier (Entity ID):
https://api.slashid.com/saml/{CREDENTIALS_ID}/metadata - Reply URL (Assertion Consumer Service URL):
https://api.slashid.com/saml/{CREDENTIALS_ID}/acs
Once you save the changes, your team members will be able to access the SlashID Console using SSO via Entra SAML integration. Make sure to assign users to the application in Entra.